Fire-TICs logo


Project 4

FLIR One with alternative lenses


This project takes a FLIR One phone camera and adapts it to a lens from an Argus3 camera, and then several other lenses. It uses the Android USB version of the camera, where capable phones from the Motorola G series can be obtained very cheaply from eBay if a dedicated processor-display is preferred, for example to build into a box.

Broken FLIR-One's from eBay are a bit of a mix, some will be battery issues while others can be poor soldering on the BGA devices of the main PCB - which is virtually unfixable for the enthusiast. More about that can be found on the EEVBlog forum.


PCB assembly design showing FLIR One in place.

Build Details


Detail of FLIR One in situ
  • [1] Ground connection wire
  • [2] 4 way USB data
  • [3] USB charge and charge LED
  • [4] Switch and activity LED
PCB design showing FLIR One connection and also fixing holes for various lens mounts from the Argus camera ranges.

PCB data file is this zip
The lens.
In the fire camera design this 15mm focal length lens gave a 50° field of view but on a 320x240 50um pixel detector. With a FlirOne Lepton core having smaller 12µm pixels, and less of them at 120x160, the field is 5.5 degrees horizontal.
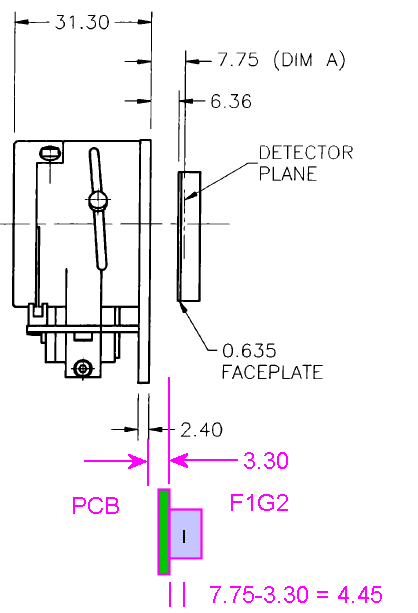
Optical dimensions.

Parts Used

  • FLIR-One
  • Motorola G4 phone
  • Software 'Thermal Camera+' by Georg Freidrich App link Google Play far better than the FLIR version.
  • Samtec FTSH-104-01-L-DV
  • M2 screws, nuts
  • PCB
  • Argus3 Lens 15mm f/1
  • M3 screws, pillars
  • Cable extension for USB
    • Harwin M20 0.1" 5 way or similar and mating parts
    • Micro USB rewireable plug (eBay) https://www.ebay.co.uk/itm/274508417065
  • Tripod mounting


  • For a finished camera head you would likely also want to add:
  • A box
  • A handle
  • Battery connector
  • Battery 1 x lithium cell

  • Before going any further do a basic test to make sure the FLIR-One still works.
    After charging up camera and phone, and found that a sequence of phone on - then connect - then turn on FLIR-One gives the most stable startup of camera+app. Phone App starts with the FLIR-One The image was as bad as you usually get with a FLIR-One without the MSX bodge of mixing in a visual image. In this setup of course the visual camera is just staring at a blank bit of PCB
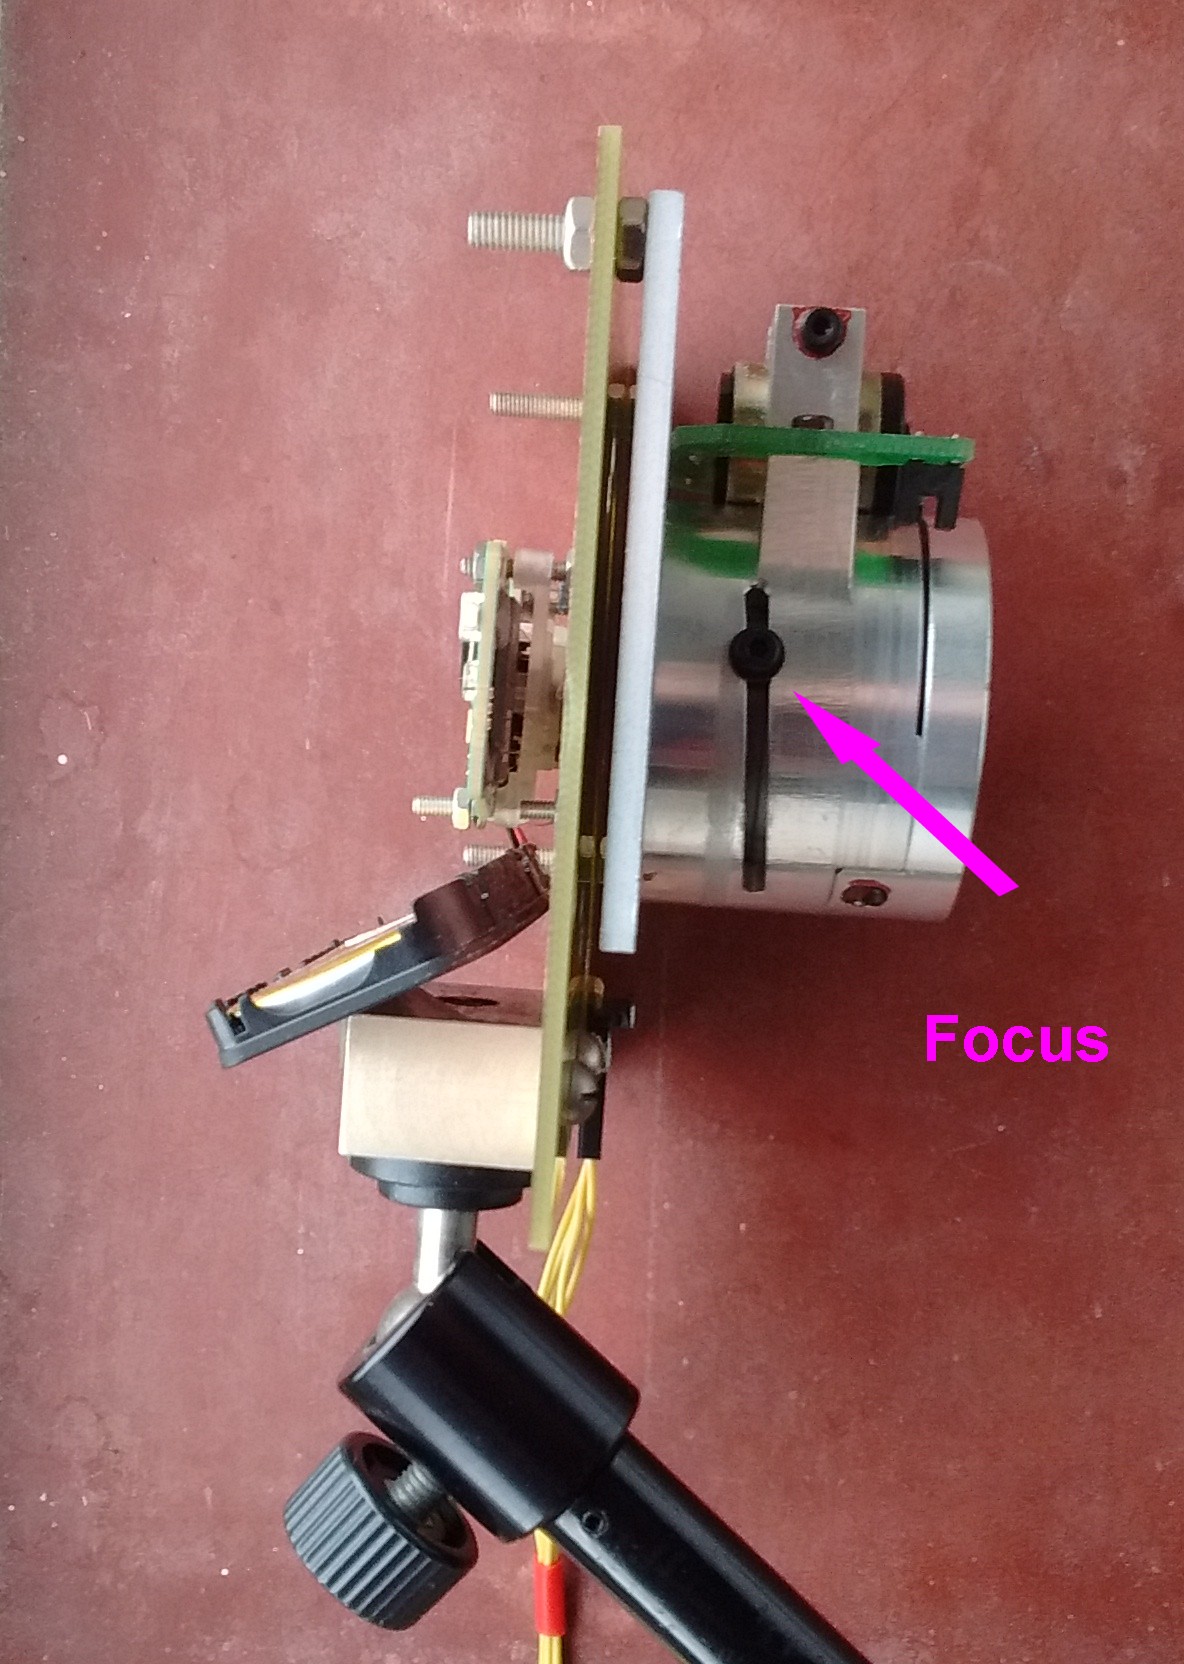
    I then set about refocussing the FLIR lens, which requires some disassmbly as the lens sits below the shutter. As can be seen this had a surprising effect, giving an almost reasonable image, which suggests the assembly process with the FLIR subcontractor in China does not include setting focus, just 'do up tightly'.
    To fit the 15mm f/1 Argus3 lens


    Videos & Images

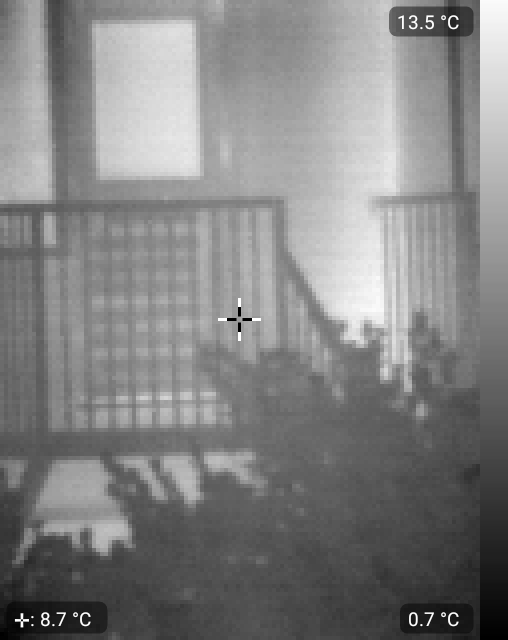
    Some images and short videos taken using the 15mm lens

    Visual

    Original Flir lens - but focussed

    View 1

    View 2

    View 3

    View 3


    Final Thoughts

    These images show that even just by focussing the lens the FlirOne can give much better imagery than as supplied. There is not much wrong with the Lepton at least for a scene with some contrast present. Moving up the quality curve on lenses helps both in resolution and as aperture reduces image noise. A 15mm is a good narrow angle choice, while not too narrow to aim sensibly.
    Connecting to a mini-USB plug is not great, if you use too strong a wire then the plug breaks, use weak wire like Kynar and the wire breaks ! Using an adaptor PCB and unbodged cable would be better, but that needs finding a real fully wired 5 way OTG adaptor cable. So many are incompletely wired.
    The battery is another weak point which would be best replaced. I have yet to find the correct connector but as this is the cause of many problems it is best avoided and again solder to the FlirOne PCB

    Part 2 - let's try some bigger lenses .......Next Page


    Back Home
    Fire-TICs Project 5 page 24 November 2021  Images © M.W.Wilson  All tradename © respective owners